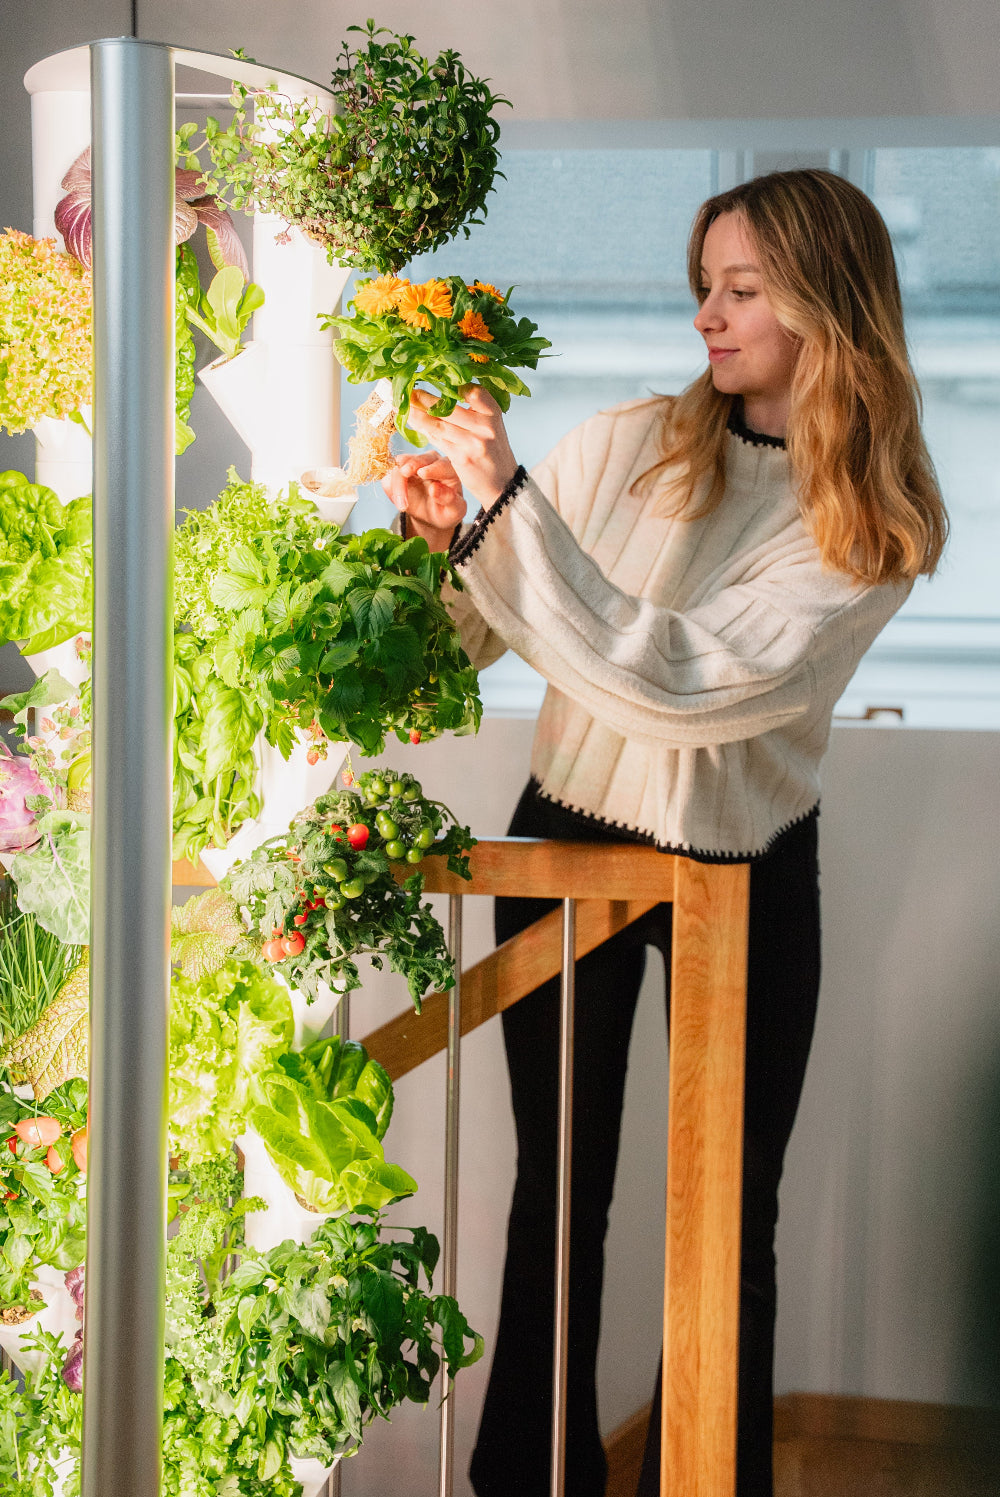
Take a look at how our Melanie is setting up her garden:
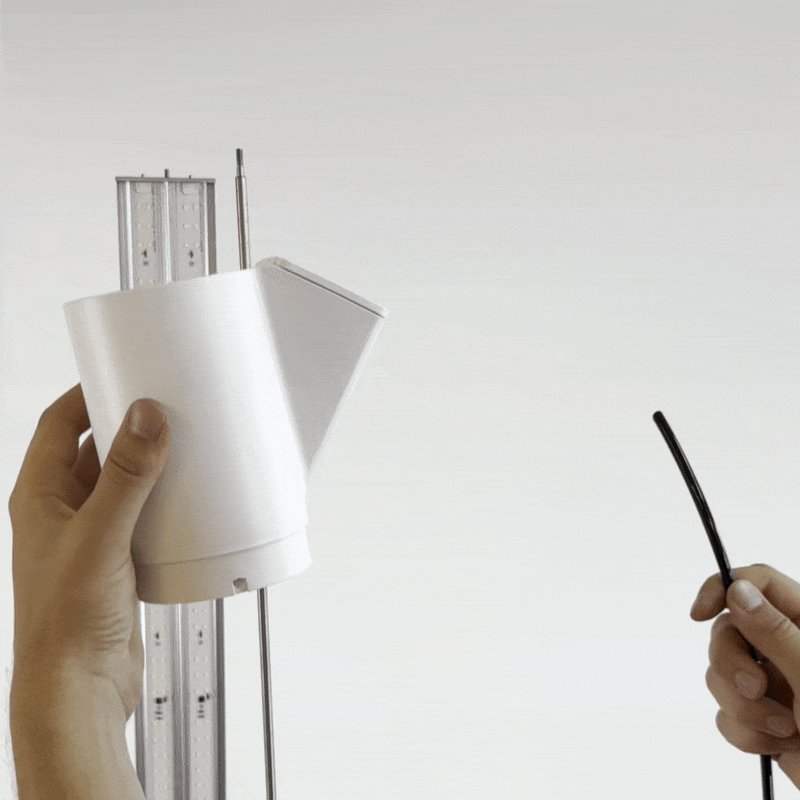
1. Attach the light bar
Feed the light bar cable through the middle of the three small holes in the top plate and align the light bar as shown. Then secure it using the two large knurled nuts and tighten them firmly.
💡 Tip: Place the light bar horizontally on a soft, non-scratch surface while tightening to avoid damaging the finish.
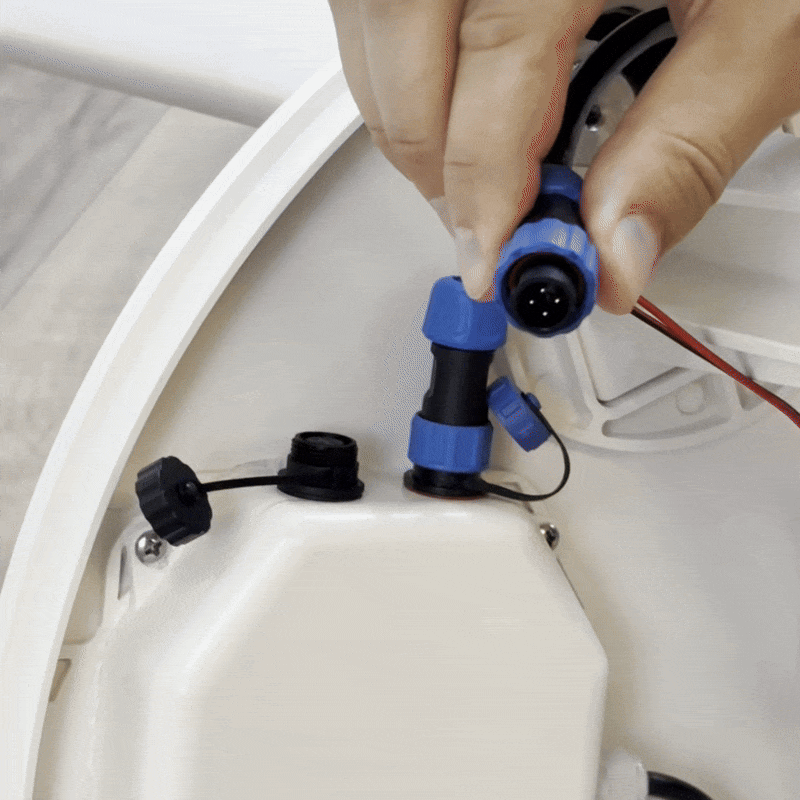
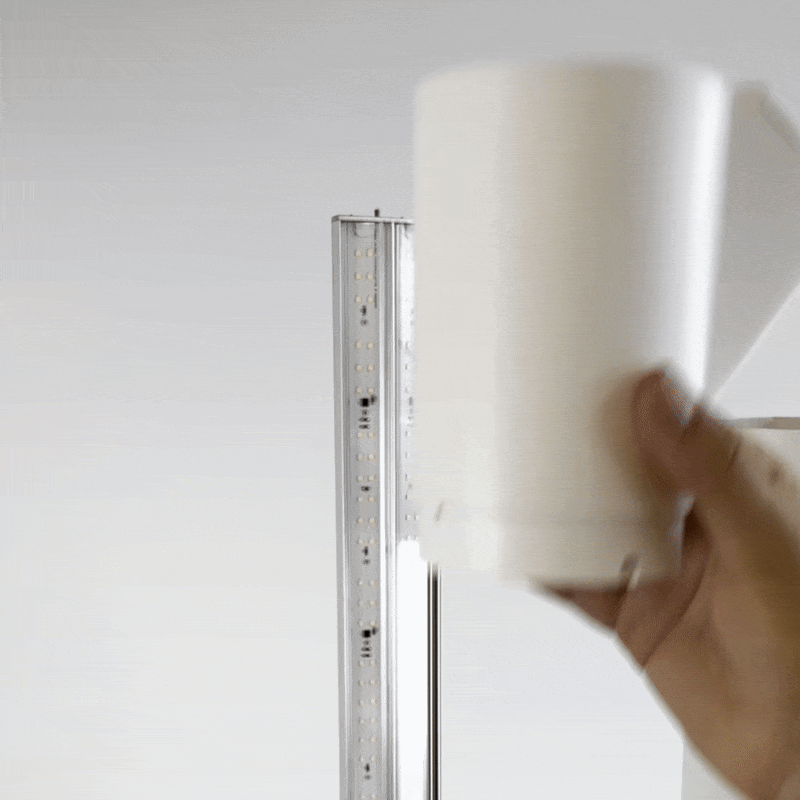
2. CONNECT THE LIGHT BAR CABLE
Connect the light bar cable to the control unit as shown and then tighten the locking ring securely.
💡 Tip: Gently rotate the plug until it clicks into place – only then tighten the locking ring.
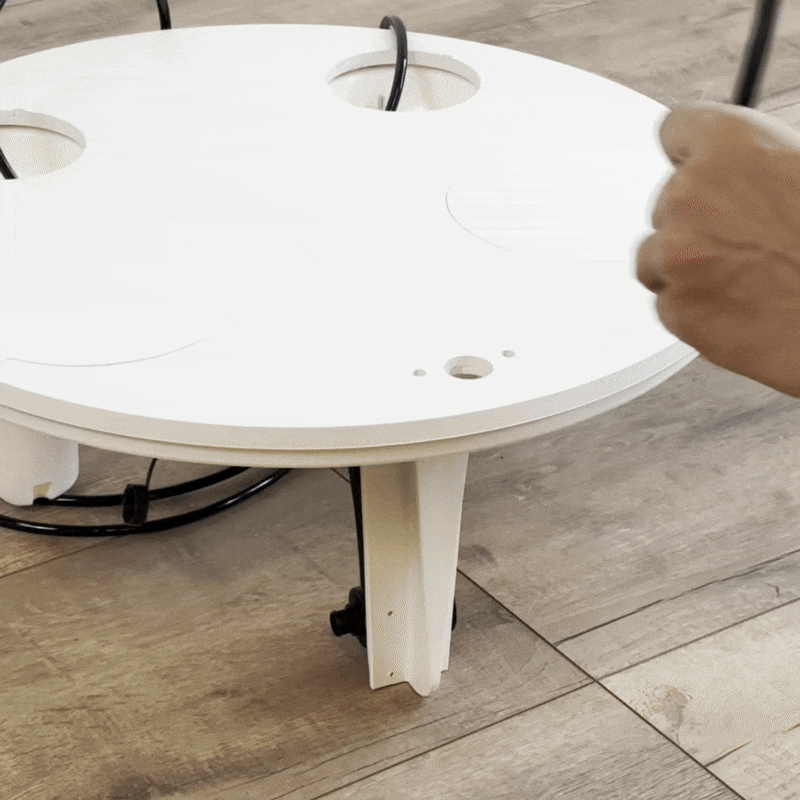
3. INSTALLING THREADED RODS
Place the top plate with the mounted light bar onto the water tank – this ensures a stable base for the rest of the assembly.
Then, hand-tighten the two threaded rods into the screws in the large openings of the top plate until they are fully screwed in.
4. Stack plant segments
Now switch to the back side of the top plate or carefully rotate the entire setup 180 degrees, as shown.
Start with the right column:
The “nose” of the first segment should point slightly to the right. Guide the threaded rod and the hose through the right channel of the segment. Make sure the hose always runs to the right of the threaded rod, is pulled all the way through, and lies flat – this prevents it from getting pinched.
To secure the first segment, align the pins on the underside so they fit into the notches on the top plate.
Place the second segment on top, rotated 90 degrees. Now the threaded rod and hose must go through the left channel.
🔁 Memory aid for orientation:
Nose to the right → right channel
Nose to the left → left channel
Repeat this pattern until 12 segments are stacked on the right side.
Build the left column:
The assembly is almost identical to the right side – with one important difference: the hose must always run to the left of the threaded rod in every segment.
The “nose” of the first segment again points slightly to the right. Guide the threaded rod and hose through the right channel.
As before, place the second segment on top, rotated 90 degrees, and guide the rod and hose through the left channel.
🔁 Memory aid:
Nose to the right → right channel
Nose to the left → left channel
Repeat this process until 12 segments are stacked on the left side as well.

5. INSTALLING THE TOP SEGMENTS
Now place one top segment (without a “nose”) on top of each column. Make sure the water channel is positioned directly above the nose of the last plant segment.
Then guide the hose in a soft curve all the way through the water channel of the top segment until it stops.
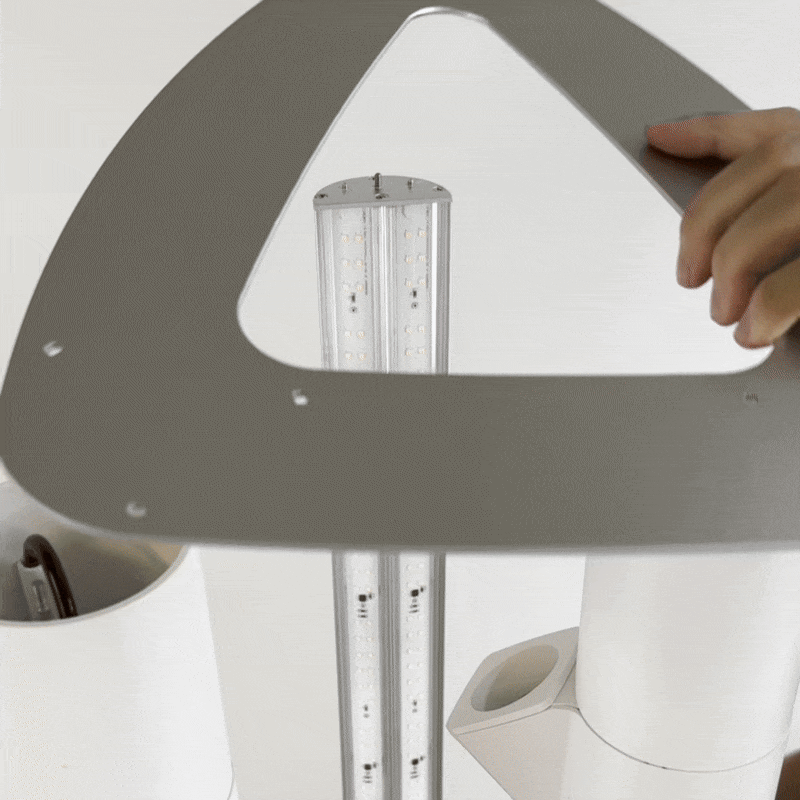
6. INSTALLING THE TRIANGLE PLATE
Place the triangle plate onto the two columns and the light bar as shown. Then secure it by hand using the smaller knurled nuts until everything is tight and the columns stand firmly.
The triangle plate has no fixed top or bottom – it can be mounted either way.
💡 Tip: Start by fastening the light bar. This makes it easier to align and attach the columns afterward.
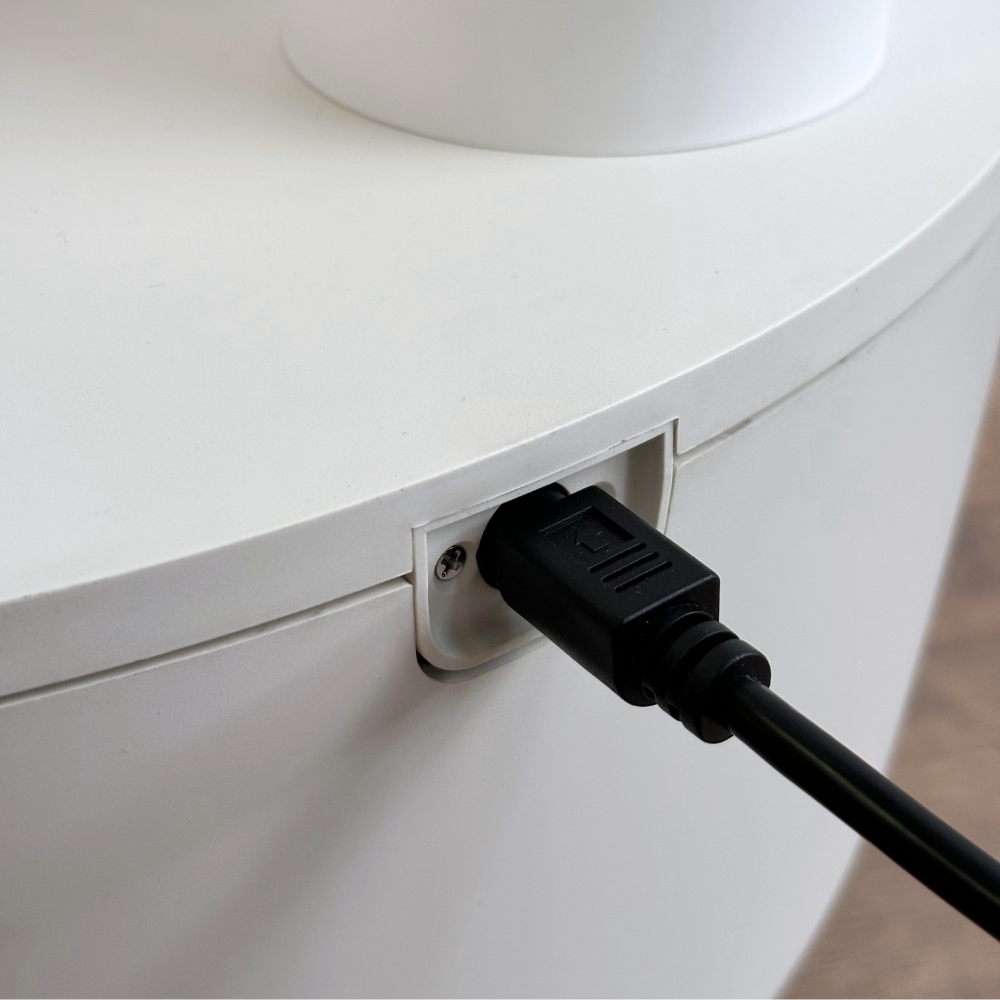
7. PLACE & CONNECT
Now place your Everleaf Garden in a suitable location by lifting both columns simultaneously to about belly height and carefully moving them.
In our guide you will find helpful tips for choosing the ideal location for your garden .
Once your Garden is in the desired location, you can connect it to the power supply. Make sure the plug is inserted with the arrows facing up and is firmly seated.
✅ The assembly is now complete – your Everleaf Garden is now ready for the first planting!
➡️ Here you can find step-by-step instructions on how to start your first plants.
-
Free shipping from 50€
-
60-day return policy
-
100% germination guarantee